A Classroom-Constructable CD Sculpture
At the invitation of Prof. Susan Gerofsky, I visited The University of
British Columbia (UBC) as artist-in-residence for a week during January
2007. The agreed-upon project was for me to develop a
mathematical sculpture that can be replicated in classrooms. I worked
with Susan, student teachers in UBC's education program, and visiting
students from Vancouver-area schools to test the ideas and write up a
lesson plan. In addition I left one example on display, as a reference
model:
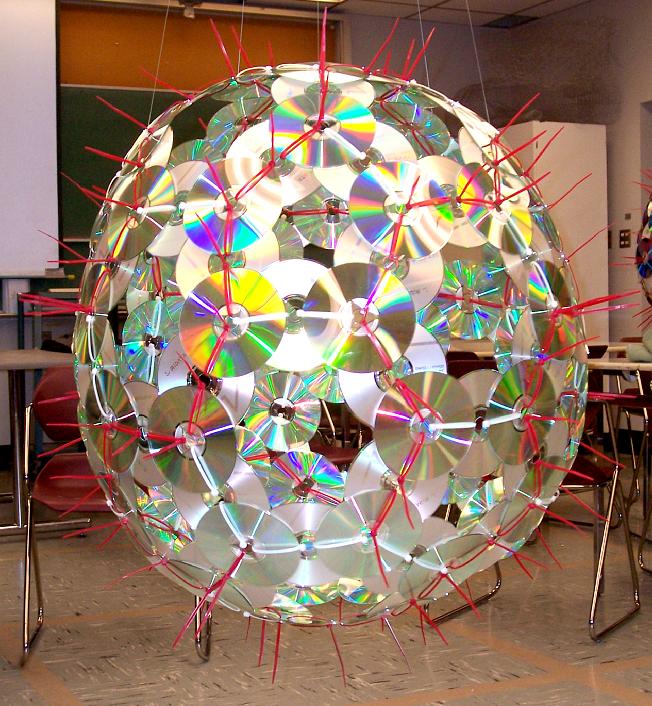
Hamiltonian Path on a Truncated Icosahedron
The classroom environment constrains the choice of materials and
techniques. Low cost was one requirement, and for safety reasons power
tools and noxious cements are not options. After considerable
thought, I designed the project around CDs, because of their geometric
circularity, reflective visual properties, easy availablilty, and
central holes. One challenging aspect of a CD sculpture is to assemble
them securely. I have made a number of sculptures with CDs, using
solvent cements to glue the plastic, but such cements were not an
option here. [1] Upon reflection, I decided to take advantage of the
holes
in the centers of the CDs and use cable ties as the assembly mechanism.
By overlapping CDs and putting tie wraps through the holes, they can be
securely joined.
 "I didn't know I could draw this"
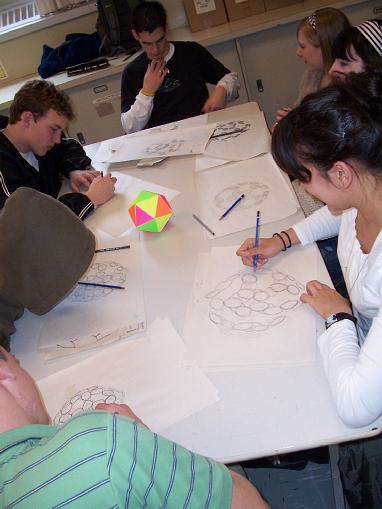
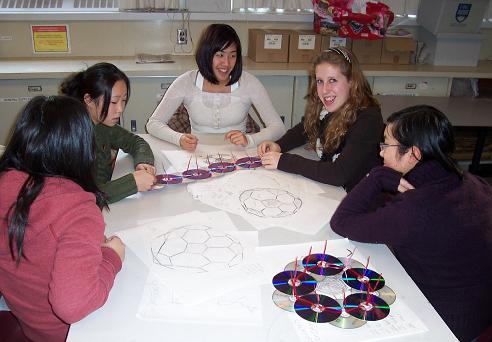
In the first half of the classroom activity, I have the students draw
polyhedra, to familiarize themselves with the geometrical ideas. While
I lead them in the board and review the polyhedral terminology, they
draw a cube, icosahedron, truncated cube, and truncated icosahedron. We
systematically count their components: vertices, faces, and edges.
 Student drawing, before construction
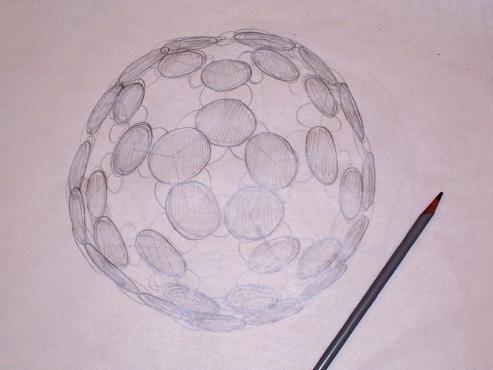
Then the students draw circles (in perspective, as ellipses) centered
on the vertices and edges of a truncated icosahedron. This gives them a
plan for the sculpture.
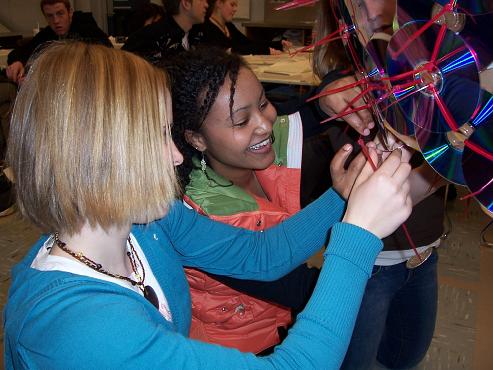
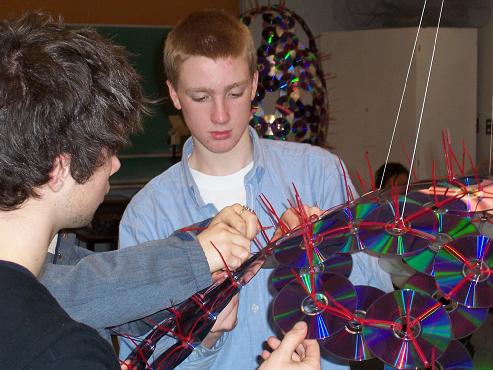
 Connecting CDs with cable ties, to build modules.
In the second half of the activity, we assemble CDs into chains of ten,
which are closed into loops. These modules are the pentagons in the
final structure. The drawings are our guide. The tails of the
cable ties all protrude upwards.
 We keep all the cable tie ends pointing outwards
Then modules are connected to form the top half ot the spherical form.
At the half-way point, it is suspended on five strings, to lift it up
and distribute its weight.
Then the lower modules are added. When occasional mistakes are made,
the ties are easily clipped so the modules can be reconnected properly.
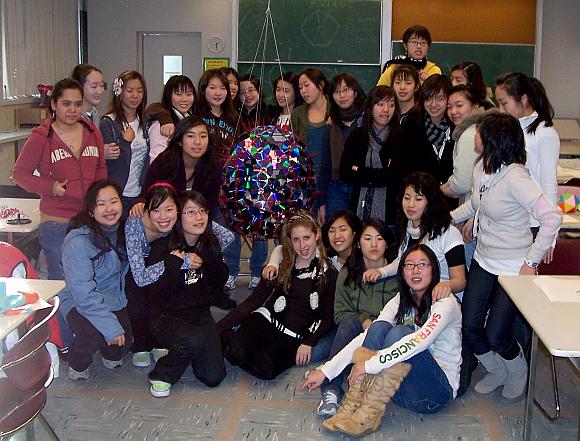
When the final connections are made, everything closes up into a sphere.
In the end, everyone wants to have their picture
taken with it.
The students seemed happy and their teachers also reported back later
that they thought this was a worthwhile activity.
 Me and my paramecium friend
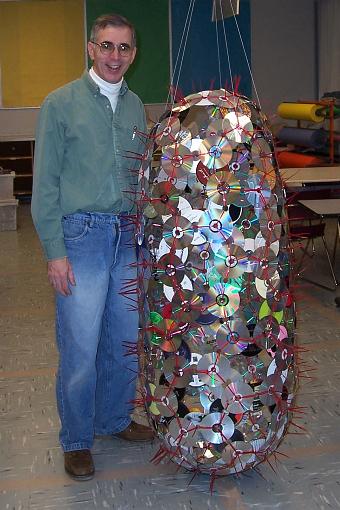
The initial design I chose is based on the truncated icosahedron, but
other forms are also possible. Above is an extended version with a
structure like a nanotube, made with a different group of students. It
is actually floating a half inch off the ground. Below is another
variation, with extended edges, making a larger, floppier form.
Spinning, it took the form of a nice symmetrical egg.
 The big egg
Another idea for variations is illustrated at the top of this page. By
using several colors of ties, one can make patterns, e.g., to create a
path
on the sphere. In the top image on this page, the red path is a Hamiltonian
path---it visits each vertex exactly once.
A lesson plan for this activity is available in draft form here, but it is not
yet complete. I'll fill in more details when I get some time someday.
[1] I had made a CD
sculpture in the form of a truncated icosahedron several years earlier,
Chronosynclastic
Infundibulum, but it is glued together, which allows the CDs to
be just slightly overlapped. With cable ties, there is more overlap, so
the same arrangement of the number of CDs gives a smaller diameter.