George W. Hart
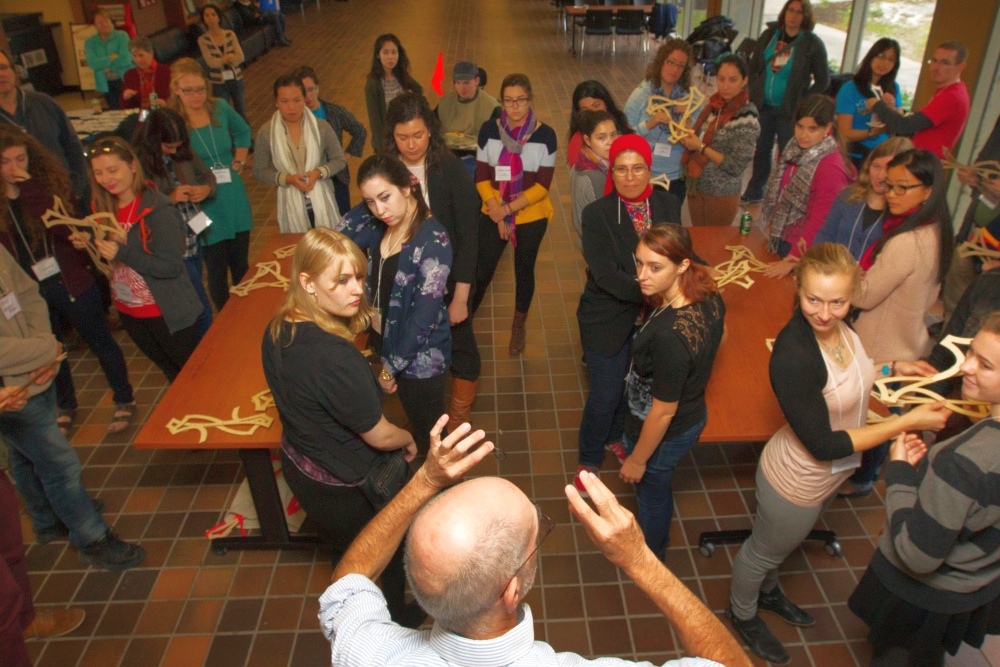
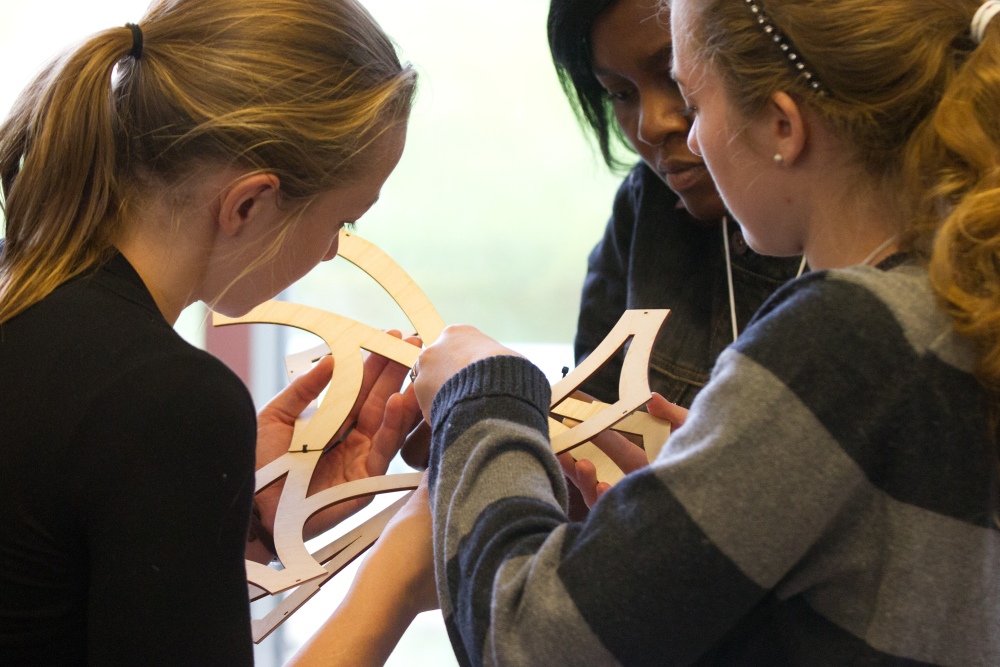
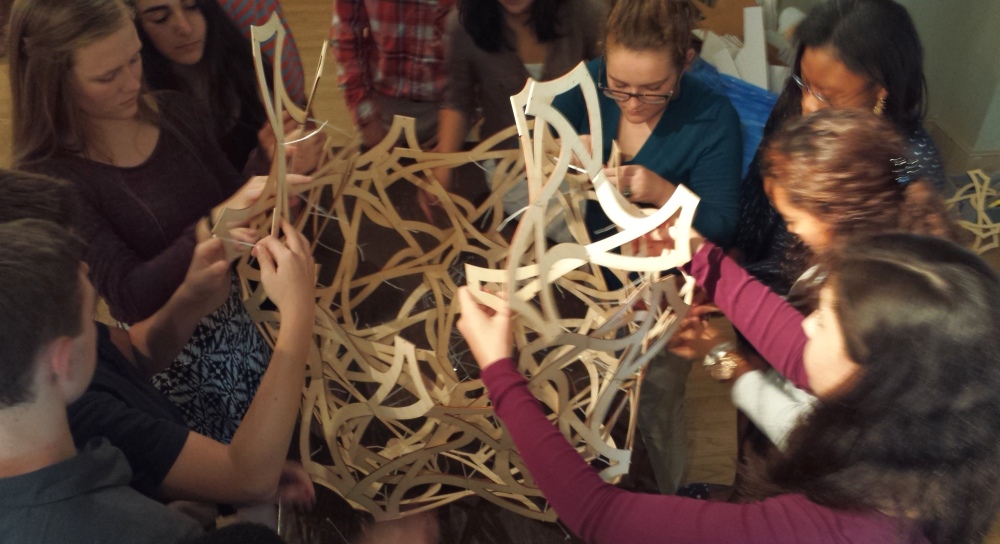
With a few hints, some groups discovered how three parts can join to make a module with 3-fold rotational symmetry. We join the parts together with small black cable ties.
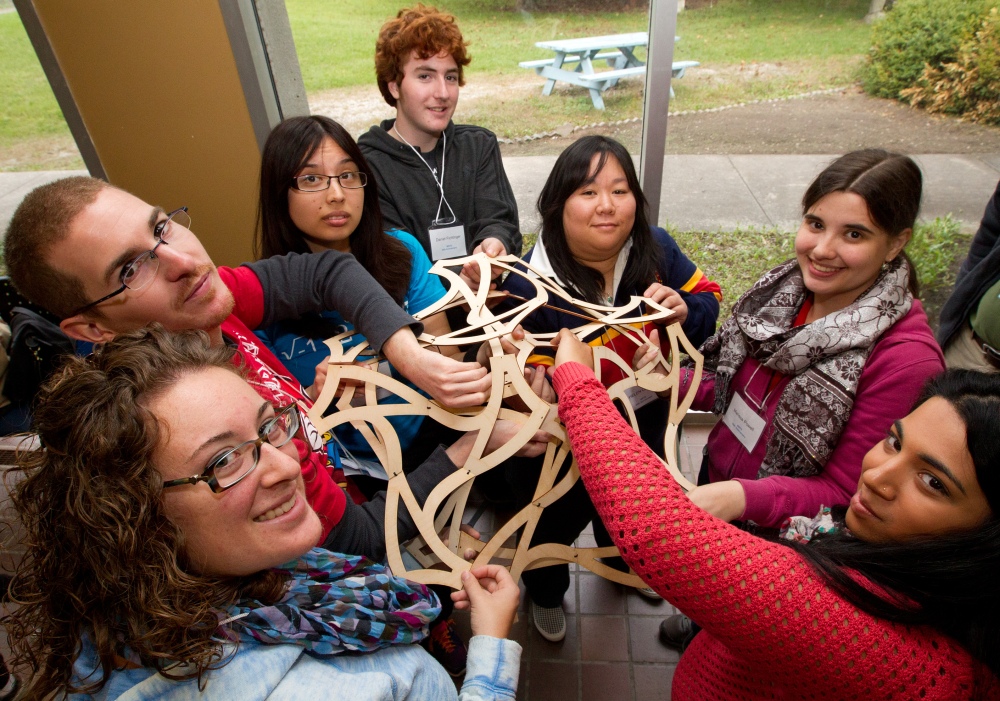
Next, five of the modules can be assembled to make one cone. It requires connection on the inner and the outer layers, both near the center and around the periphery. It also takes some manual dexterity to get your hands in the right places and feed the cable ties from the inside.

Other participants make another cycle of five modules which will be the cone on the opposite side. This is the cap that that will be added last, so it is put aside for a while.
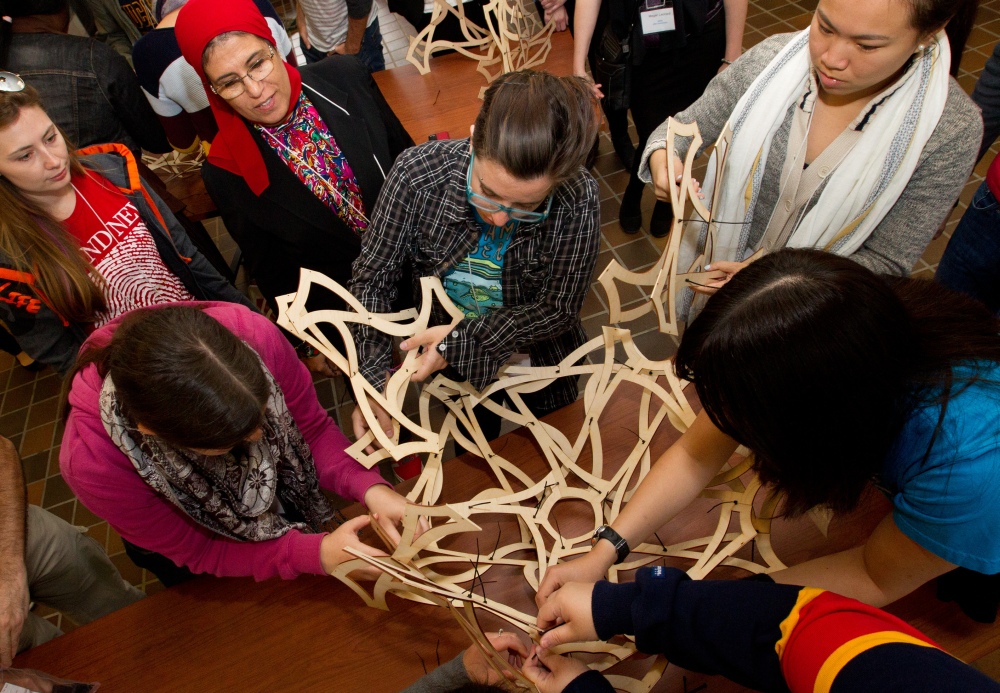
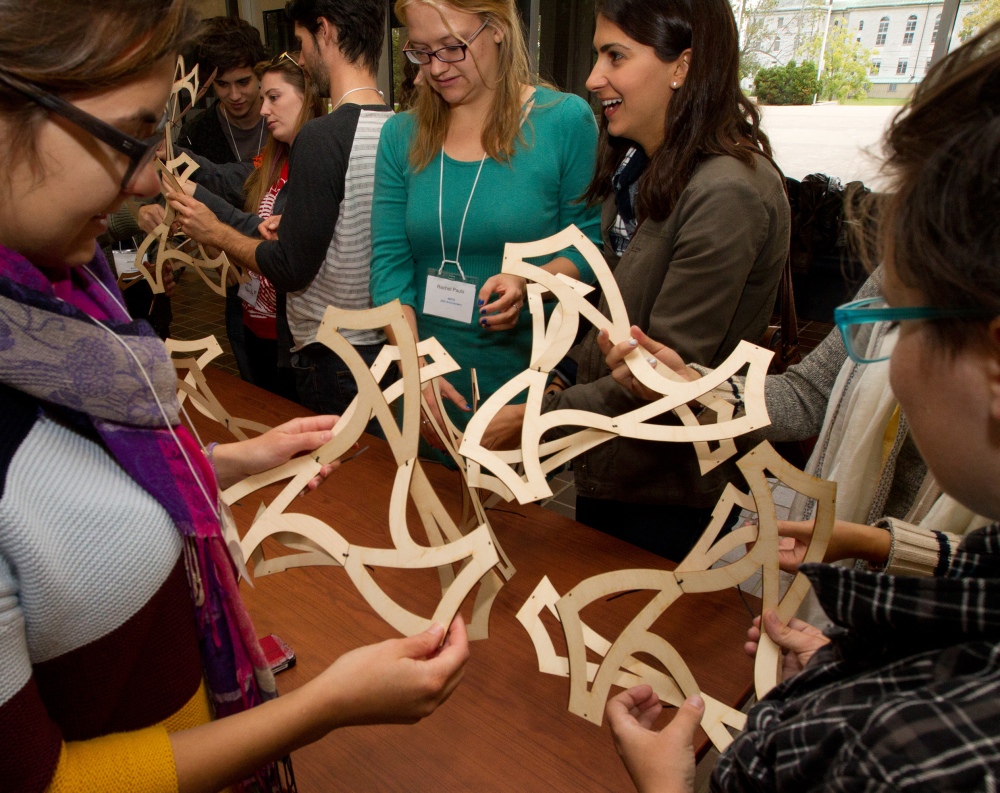
Now we can add ten modules around the first cycle of five. The shape of the parts guides the process because everything lines up perfectly when properly positioned, so it is easy to see if a module is put in backwards or incorrectly.
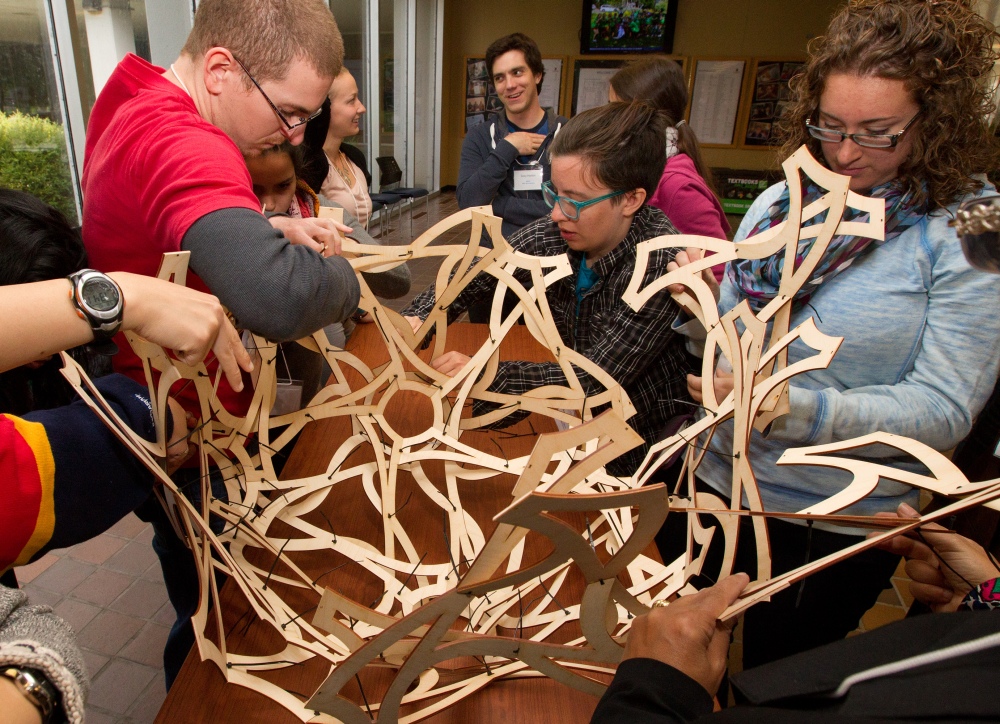
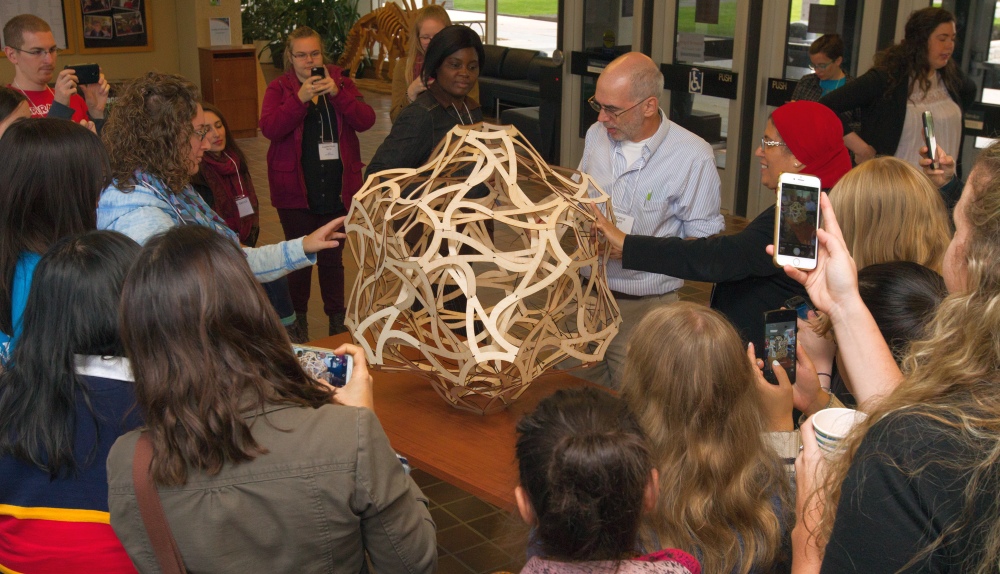
This goes on for a while because there are lots of connections to be made. The nice thing is that I don't have to say or do anything at this stage. Everyone gets engaged with the puzzle of where to add additional modules and they can help each other if there are any problems. The long tails of the cable ties, visible on the interior, will be clipped off later.
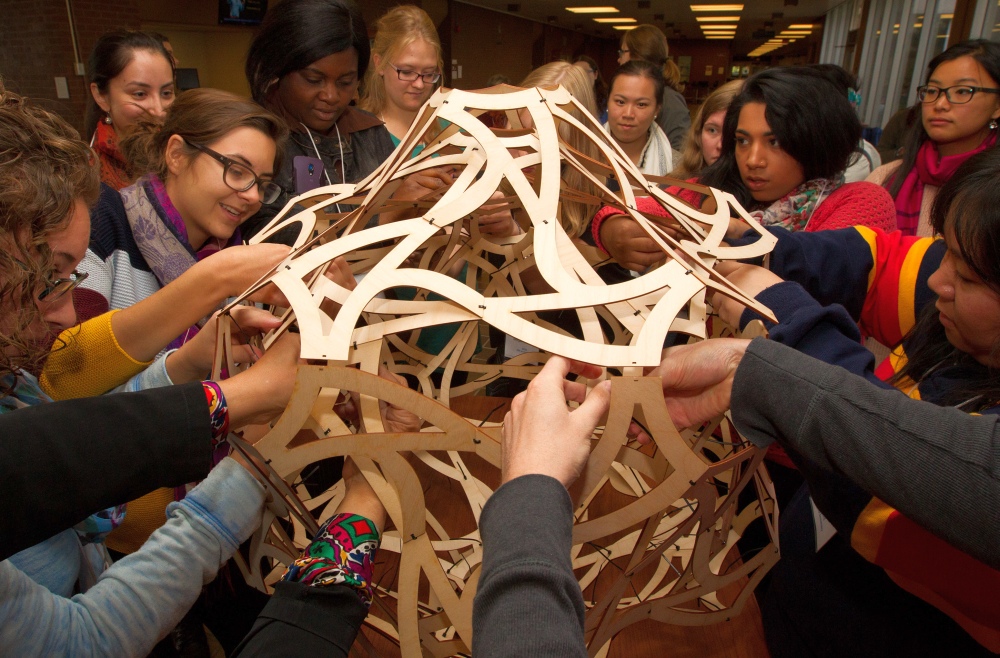
When the top cap is added, everyone can reach in from all sides to insert the many cable ties through the small rectangular connection holes. We're starting the ties from the inside so they remain largely hidden on the inside.
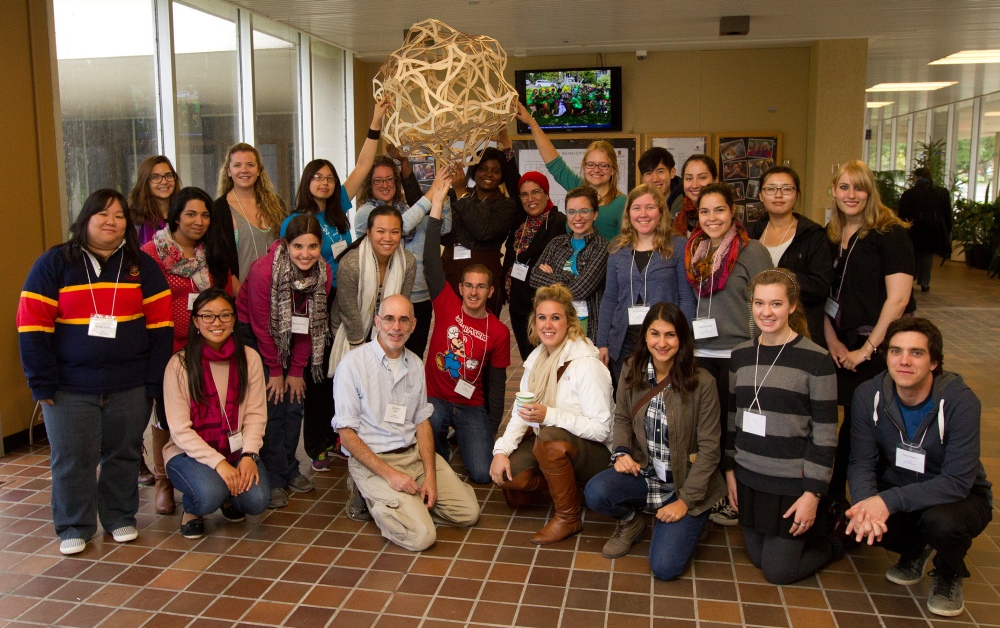
Here's the final
result and most of the participants before we suspended it
on permanent display by a wire from the ceiling. You
can go to see it in the lobby of McArthur Hall (511 Union
St.).
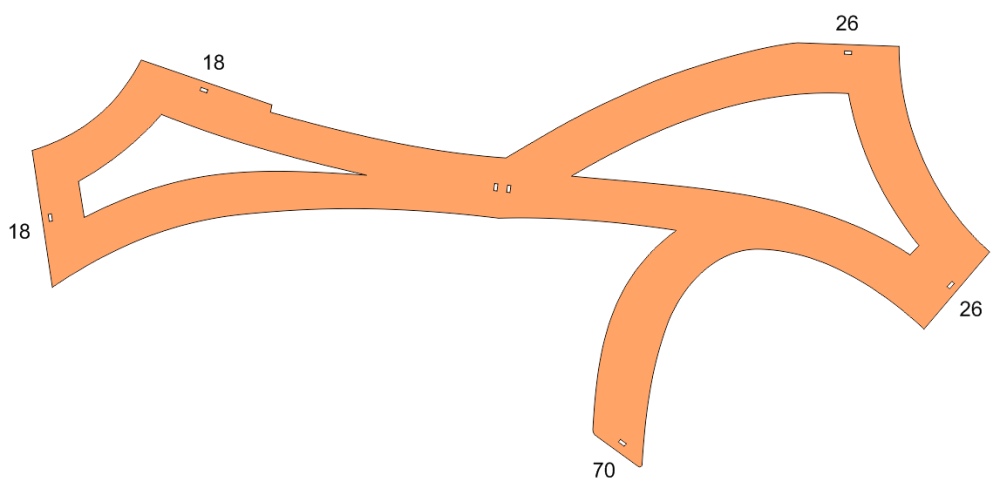
If you want to make your own version of Volcanoes, here's
the part template. You'll need to laser-cut sixty
copies of this shape from plywood. (3mm to 6mm
thickness will work.) Then the five straight segments
need to be beveled to the angles indicated (in
degrees). I use a disk sander for that. You can
read more about my laser-cut wood and cable-tie sculpture in
my paper here
from the Bridges 2015 conference.
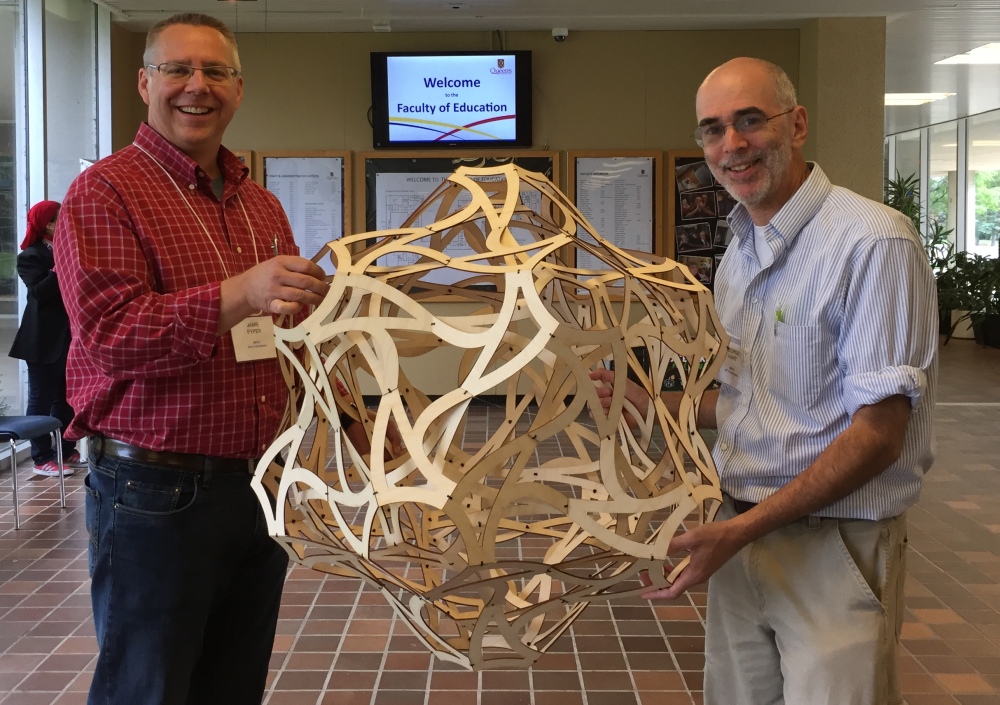
Thank you to all the students and teachers of the Math, Science, and Technology Education Group at Queens University, Kingston, Ontario who participated, especially Jamie Pyper for inviting me and organizing everything. And thank you to the photographer, Lars Hagberg, for taking the wonderful photos above, capturing the spirit of the event.
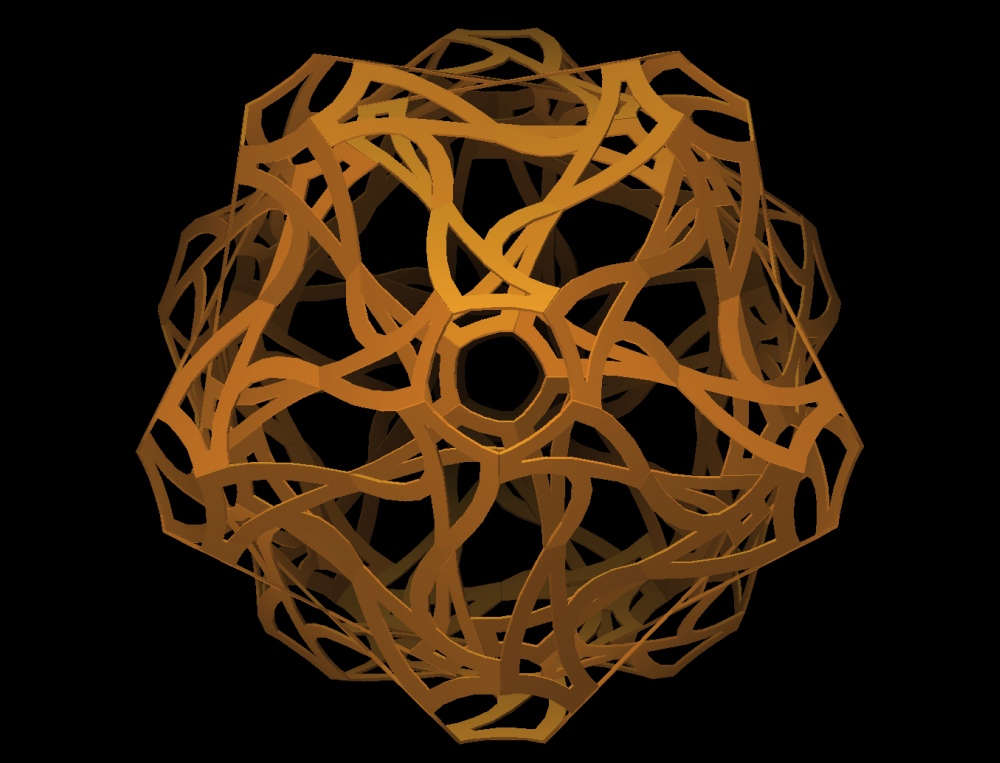
Test-Fit
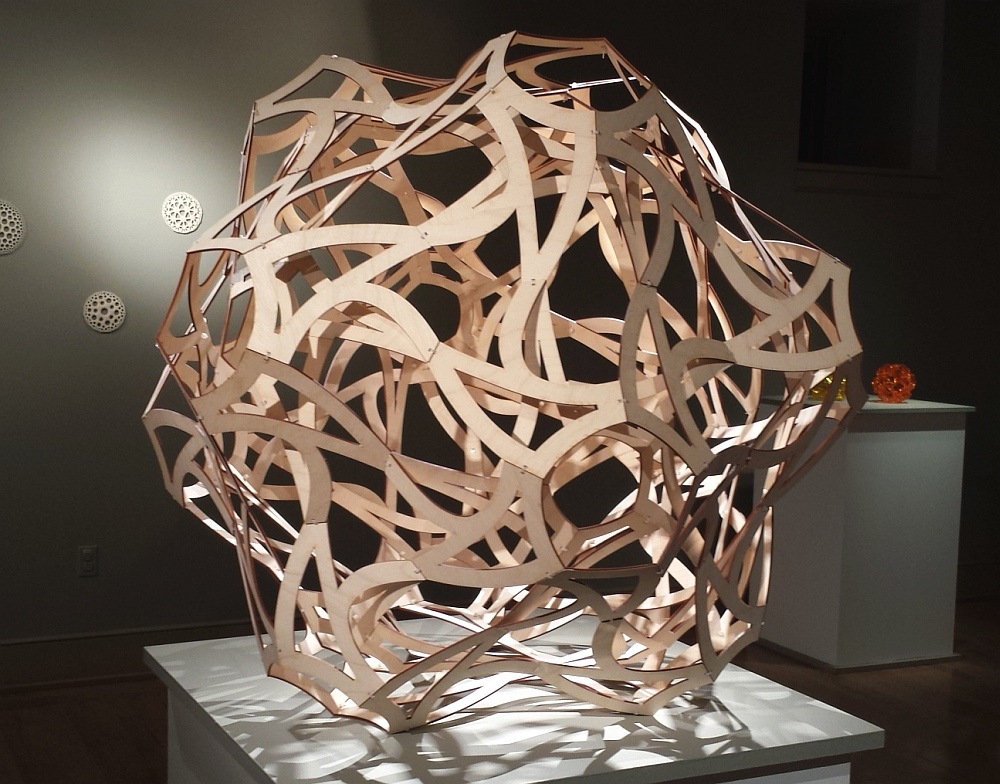
It was displayed there as part of a Symmetric Structures exhibition.
Thank you to everyone at the St. Andrews School, especially John Burk and John McGiff.