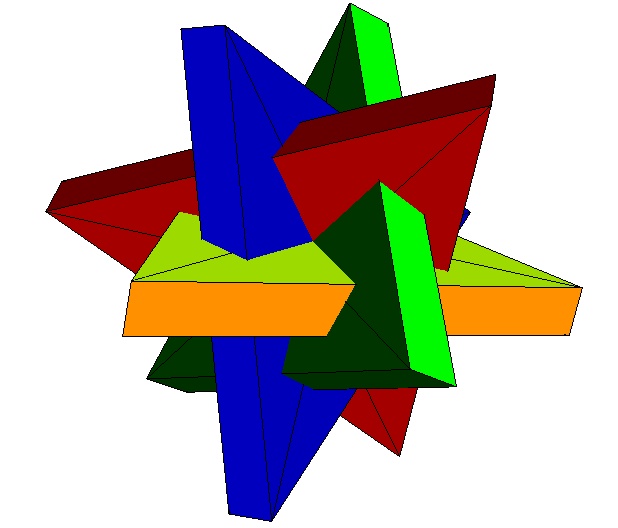
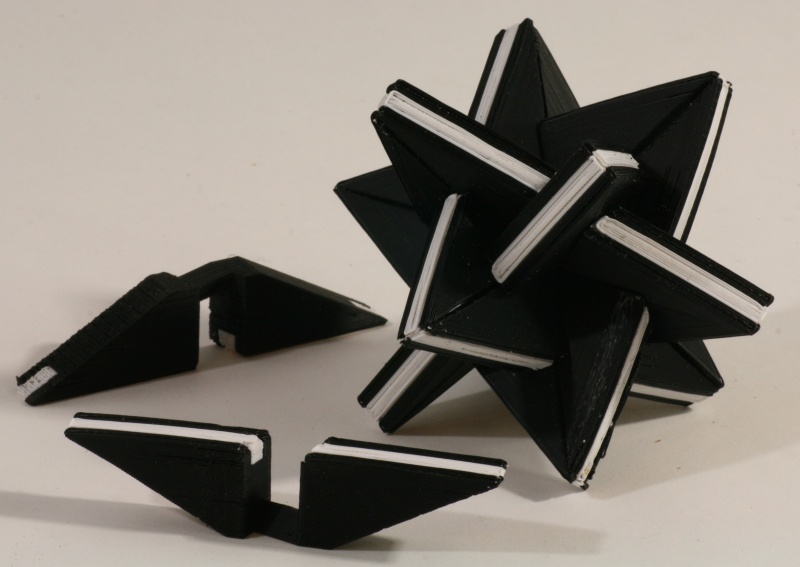
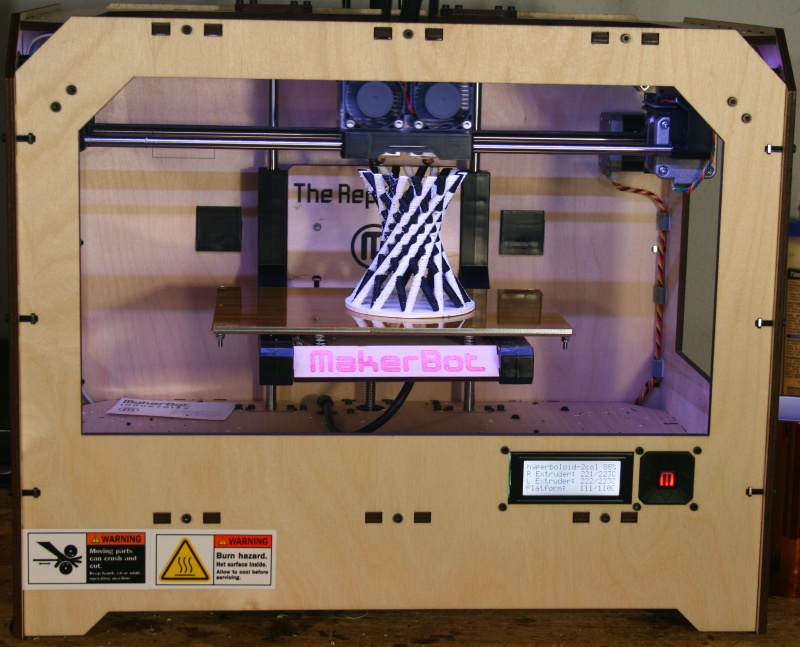
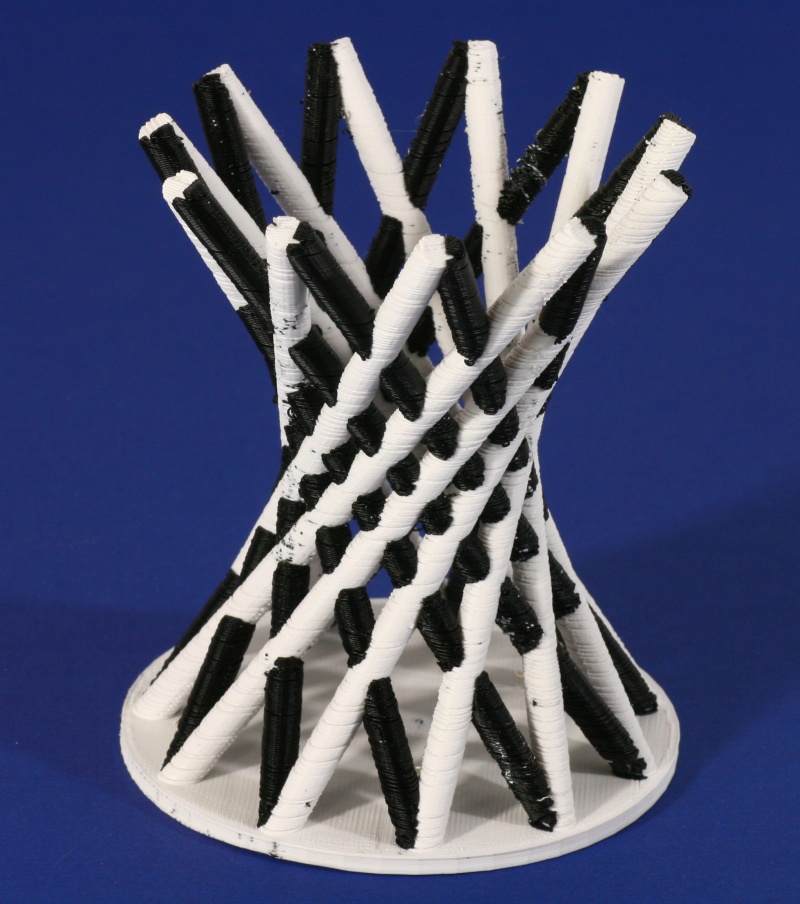
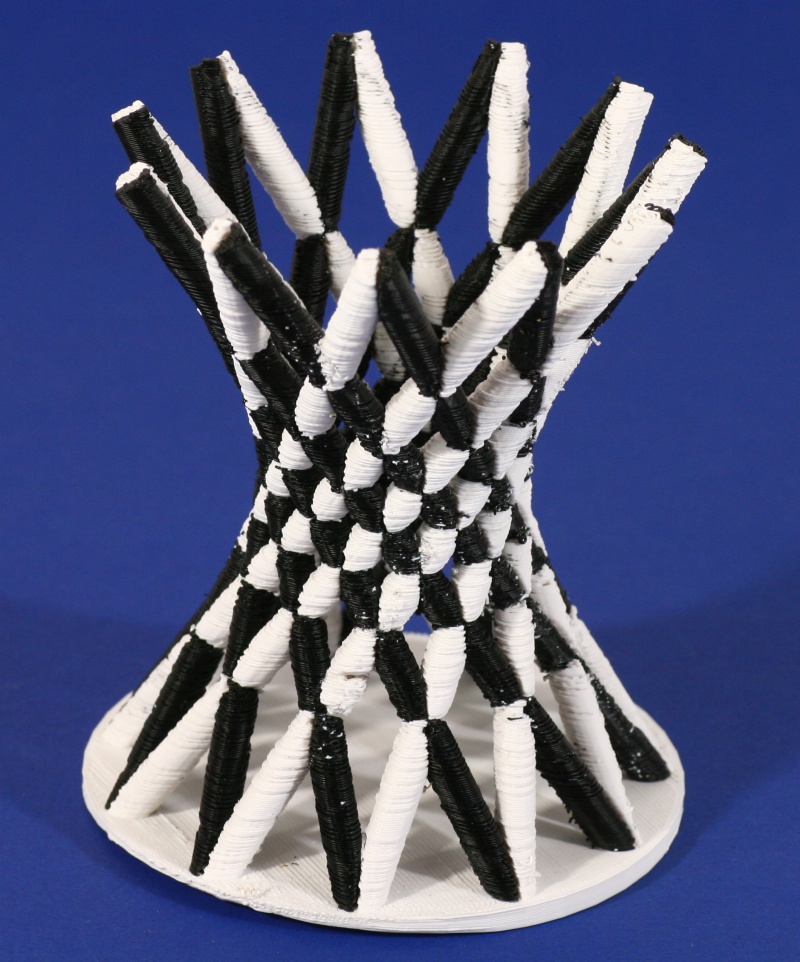
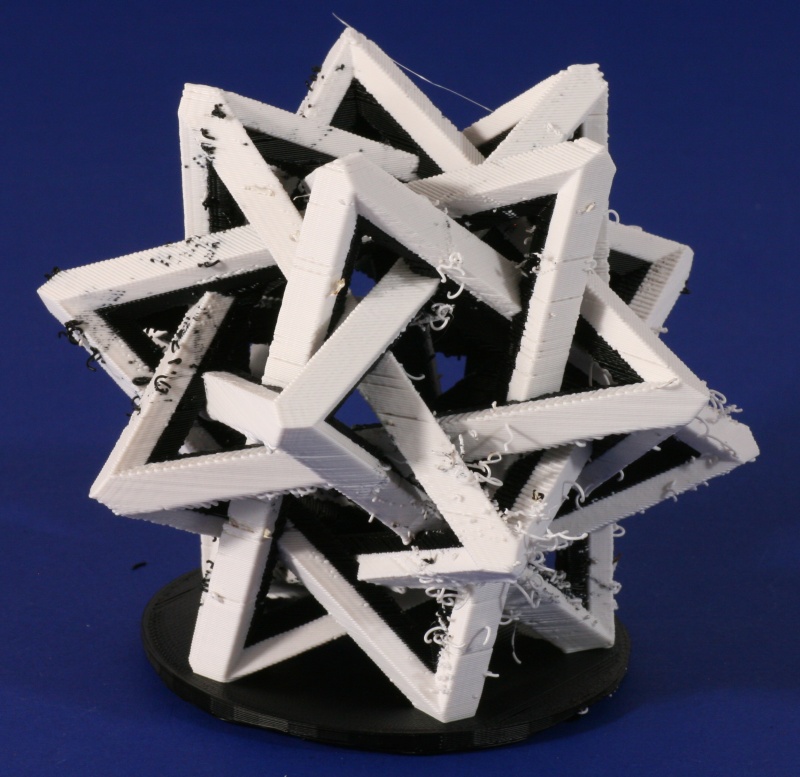
Here's a sculptural treatment of the compound of five
tetrahedra. There are five identical tetrahedra
concentrically interwoven through each other. Each is
white on the outside and black on the inside. This is an
ambitious build, because the nearly horizontal bars were built
without support, so it is rather hairy under the arms, so to
speak. The above photo is straight from the machine, still
stubbly with stray ooze.
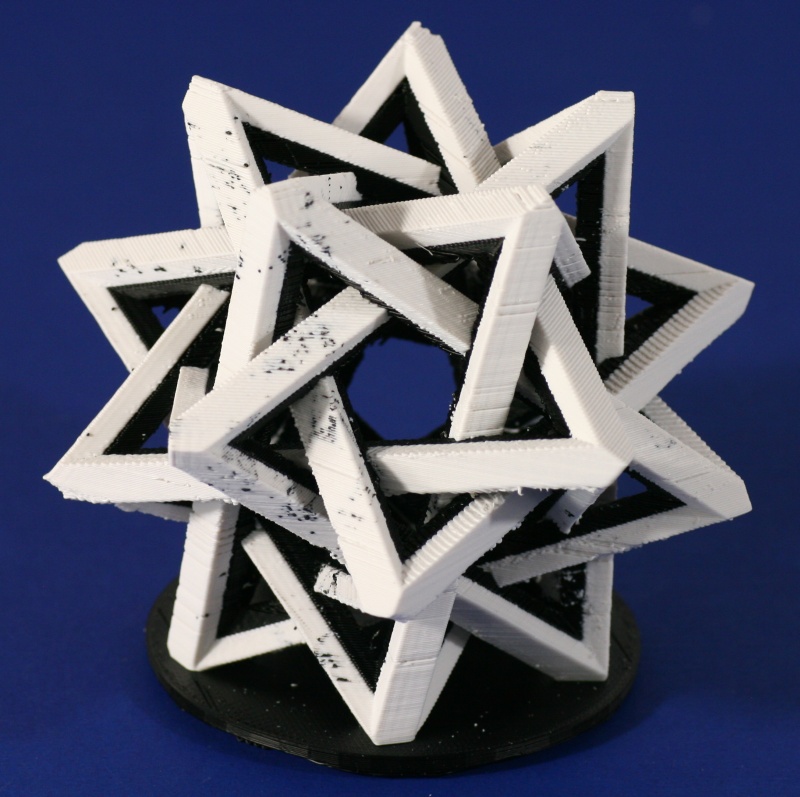
After cleaning it up a bit by scraping it with an x-acto knife,
it looks much better. To make your own copy, you can use these
stl files for
white and
black.
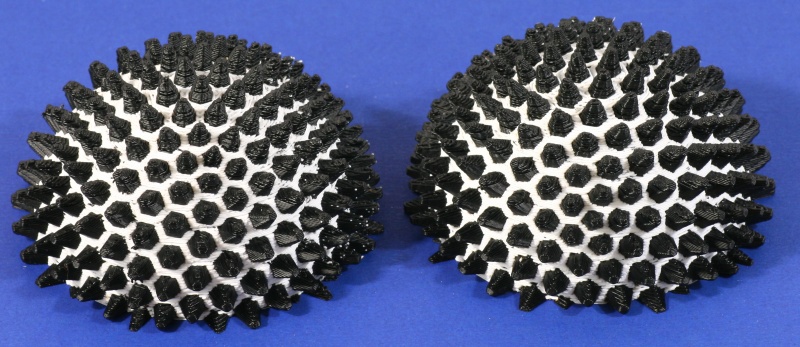
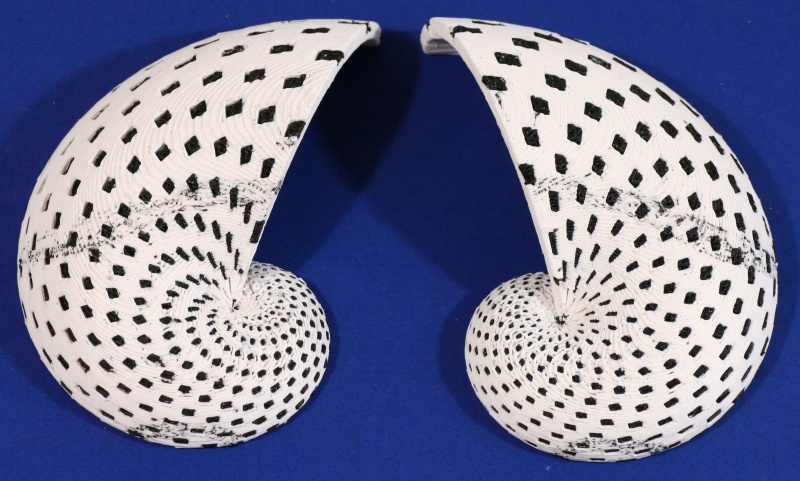
Here are the two halves of a hypothetical nautilus-like shell.
My goal here was to comment on the common mis-conception that
the nautilus has a golden ratio spiral. A real nautilus
doesn't. This is what a nautilus shell would look like if
it were based on a golden spiral. I built it in halves on
a raft, then glued the halves together.
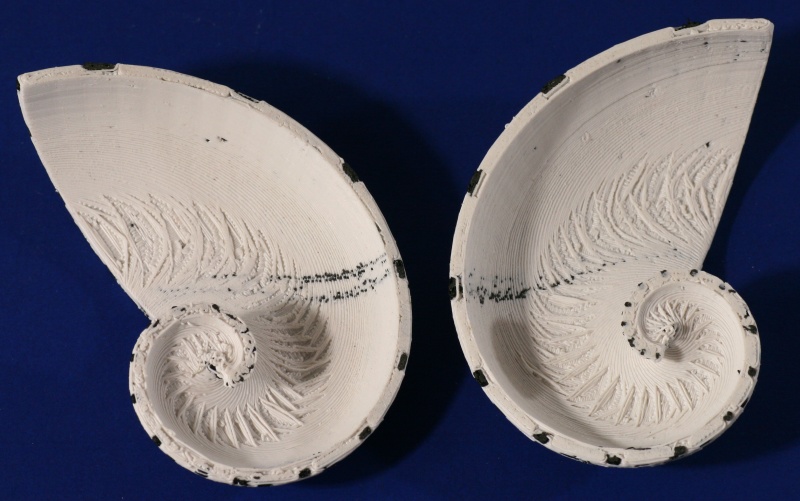
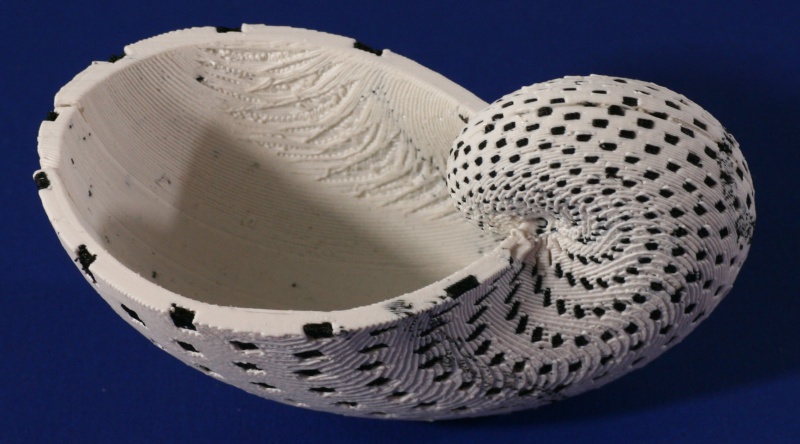
The inside is a bit messy at the horizontal peak, but it isn't
too bad after a light sanding, especially since people mostly
see the outside. You can see I designed the inside half of
the shell's thickness to be all white, so there is a continuous
inner layer for strength. The black decoration is only on
the outer half.
I'm quite happy with the final result. There's a video
explaining more about it
here.
If you watch carefully, you'll notice the end of the raft
started separating from the platform during the build, so I
taped it down with some kapton tape. The files for the whole
shell are here:
white,
black. I cut these in
half, rotated the "bottom" half to lie in the +Z halfspace, then
raised the black up by the raft thickness and built them using
just a white raft. Here files for the two halves, which
you can use to build it this way, but before I raised the black
by my raft thickness, i.e., these are registered to be built
exactly on top of each other. Build the two "top" ones
together and then the two "bottom" ones together:
shell-nautilus-halves.zip
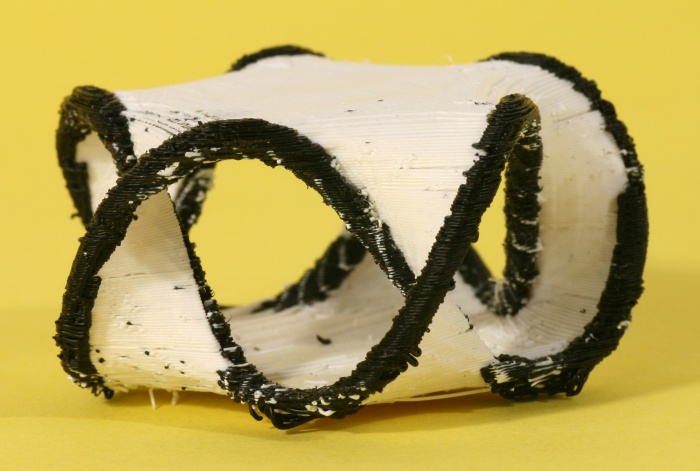
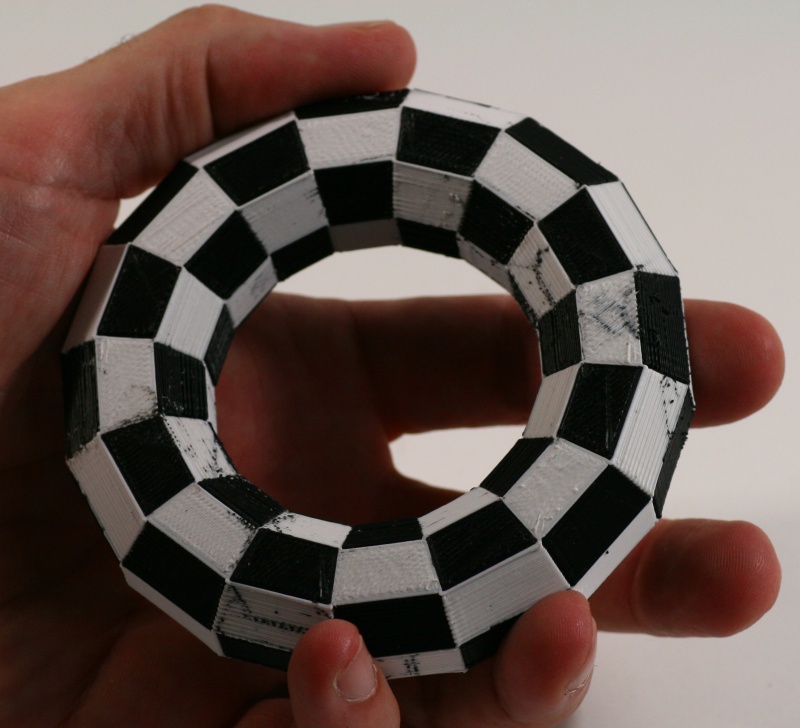
Here's a two-color
mazzocchio.
This is a polygonal torus which was a popular design for a hat
in Northern Italy in the fifteenth century. To make your
own, here are the stl files for
black
and
white.
Be careful not to mix centuries!
I tried making a Seifert surface based on the (2, 5)-torus
knot but it didn't come out very well.
You might have better technique. The files are
here and
here.
So I made a white one and...
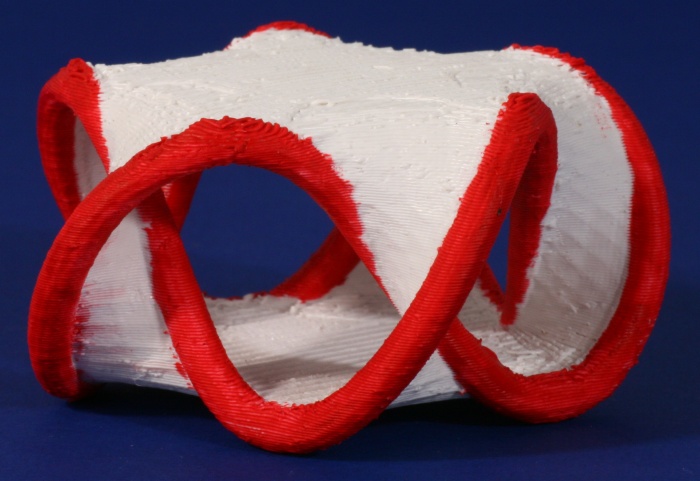
...I painted the edge red. The file is
here.
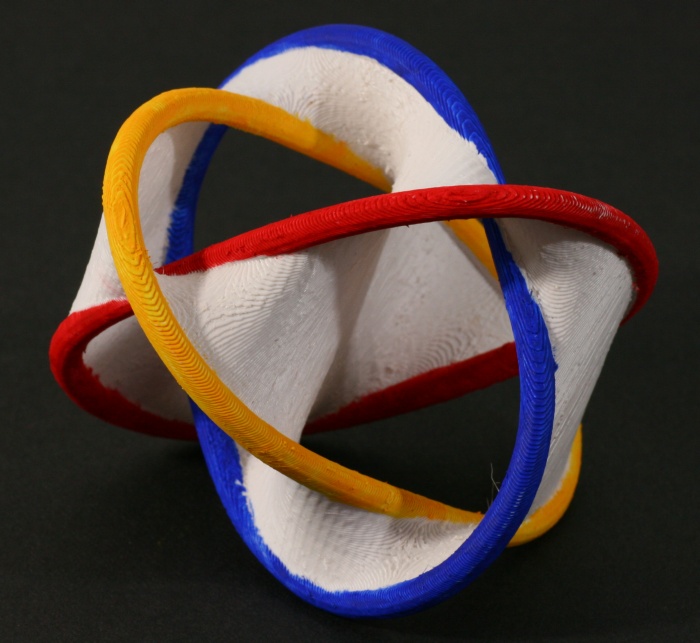
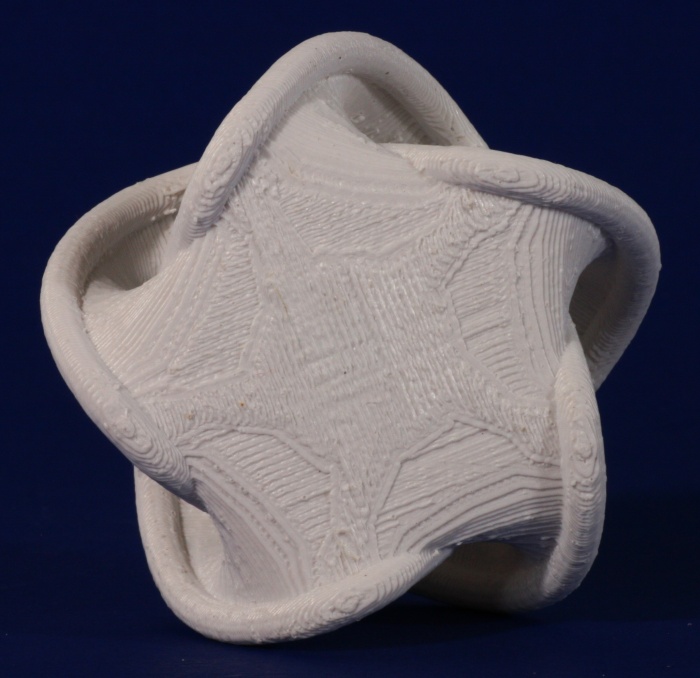
Similarly, I made this Seifert surface based on the Borromean
rings and painted the three links.
It looks really great! The stl file for this is
here.
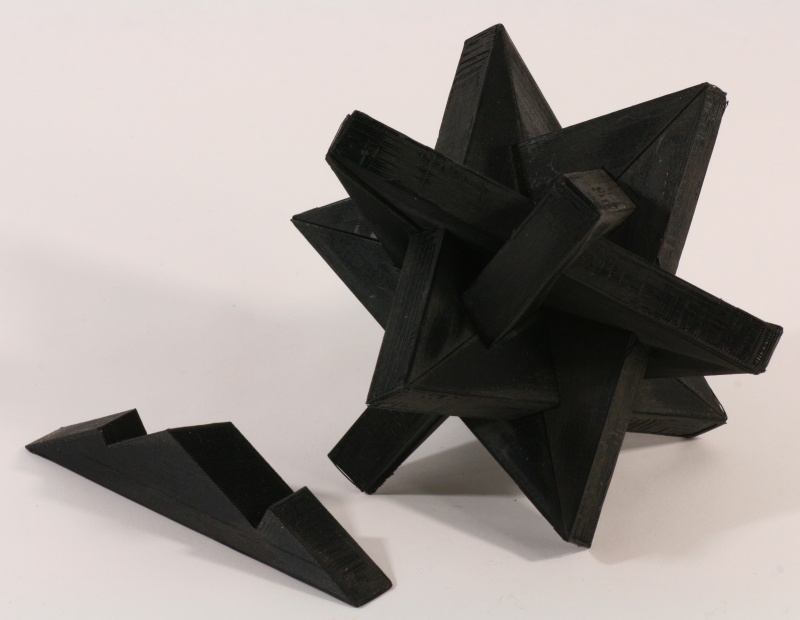
Here's a design for a 12-part
puzzle which is shaped like four concentric, overlapping
triangles. Each triangle is composed of three identical
parts. A wood version of this puzzle, called
L'Etoile, was
originally designed by Phillip Dubois and commercially
available in the 1980s. Not knowing what the interior
of the pieces looked like, I could only hypothesize about
the exact part shape on the inside where the triangular
slabs overlap.
My first design used this part shape, in which each part
locks around the outside of two neighboring parts. The
stl file is
here
if you want to make a copy, but I don't recommend it,
because this design is very difficult to assemble and
disassemble.
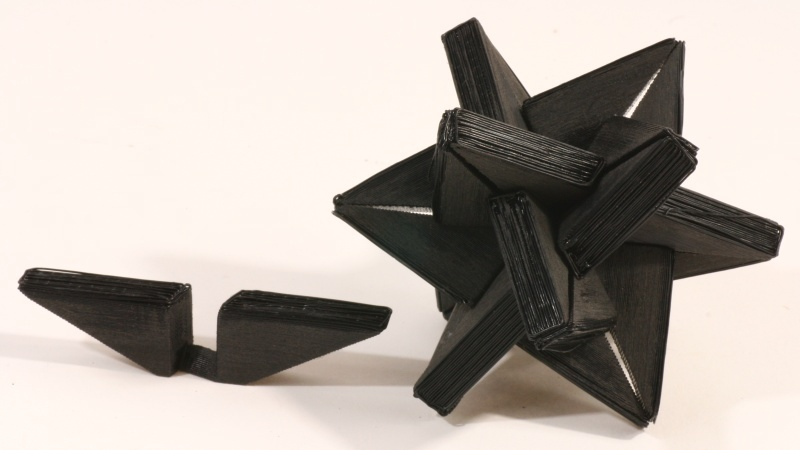
Then I saw a picture of the disassembled Dubois puzzle and
saw how he cut the interior differently. This is a
small test model, and you can see big gaps in the joints,
due to the part warping. The gaps will shrink if you
scale the parts up to about 150% from
the stl file I
used.
Finally, I made a larger version in two colors, adding a stripe
to emphasize the four triangles. You can make a copy with these
stl files for
white and
black. It is a nice puzzle
to assemble twelve parts into the four triangles. (Hint: first
make modules using a few pieces, then combine the modules.)
Here are some patterned rollers based on M.C. Escher and
ancient designs, which can be used to shape cookies or
ceramics.
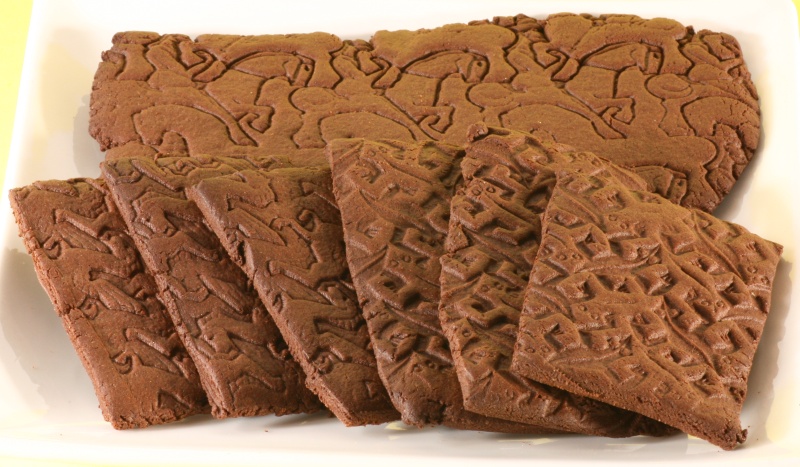
Chocolate cookies made with some of these rollers. The
stl files and detailed information are
here.
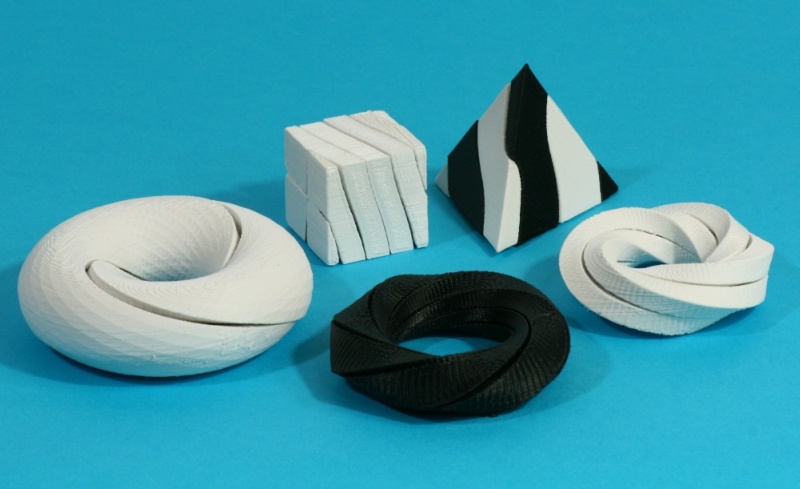
Here is a set of five puzzles that involve rotational or
screwing transformations in one form or another.
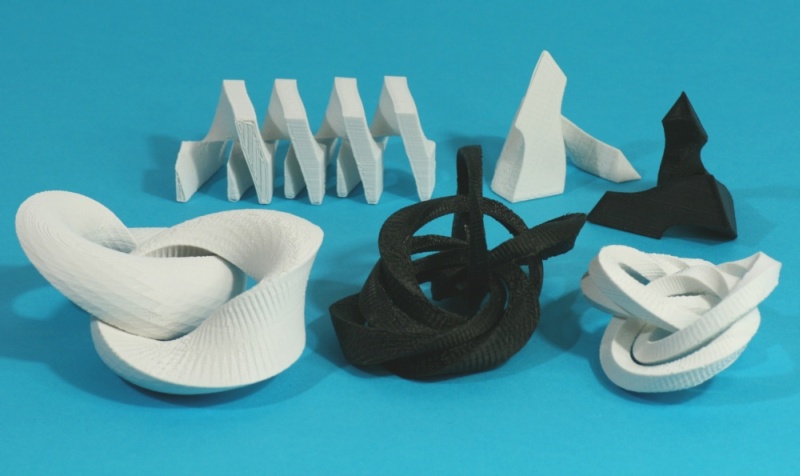
Here they are disassembled. I put the STL files and
description of them
here.
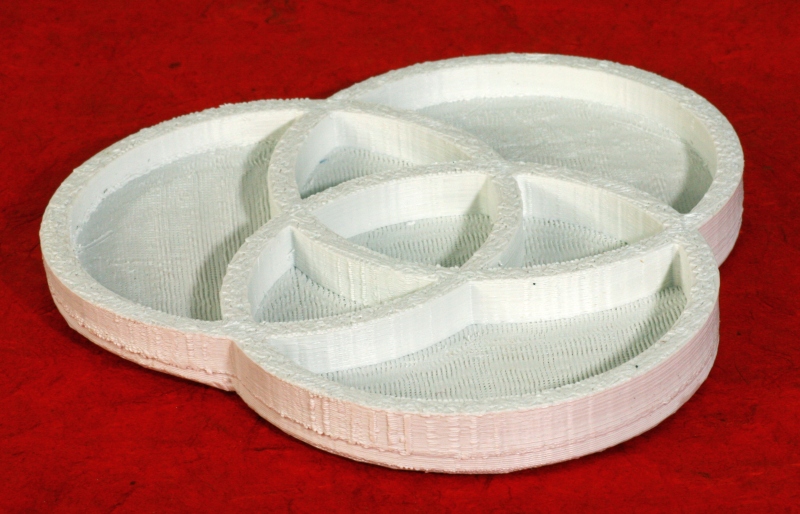
I created this Venn Diagram Candy Dish as an
exercise for participants in a course I am teaching to math
teachers at Math for America in NYC. The course is
called "3D Printing for the Math Classroom." Although
this design is intended as an exercise for others to have
practice in techniques for generating stl files, here's
the stl file (11 MB) in
case you just want to build one.
I then looked online and found someone else previously made
a nice Venn diagram candy dish, produced by vacu-forming,
not by 3D printing. Check out
Margaret
Cumming's blog page to see how the compartments can be
filled nicely.
Here's a two-color model of a sculpture
Dual
Planetoid by
Bjarne
Jespersen (who is undoubtedly the world's greatest
mathematical wood carver). In his version, he
carved the two interlocking pieces out of a single block
of wood and they are free to wiggle just slightly.
We were about to get together at a conference at which
he was building a larger wood version of the design, so
I thought I would make my own 3D-printed version to
bring along.
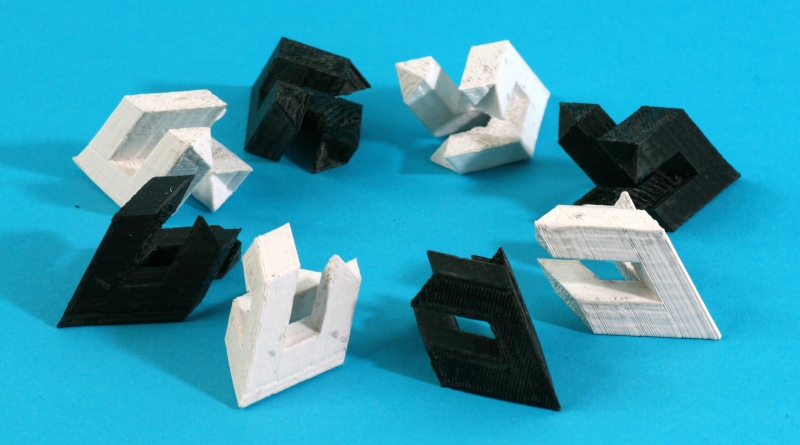
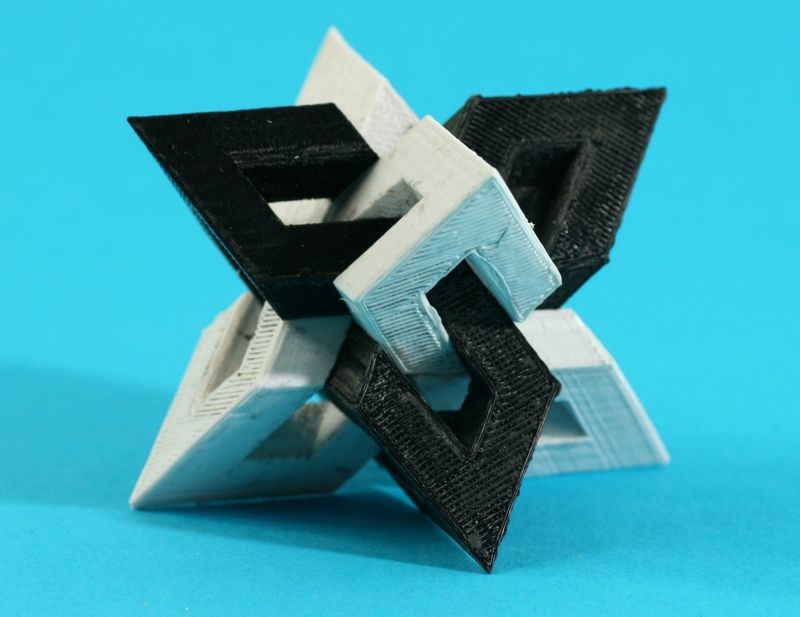
I adapted the design to be a puzzle with
eight identically shaped parts that snap together.
The parts are not exactly 3-fold symmetrical. One
of the three prongs of each part has an extra octahedron
and you need to position them thoughtfully to assemble
it. Here is
the stl file
so you can make your own copy. Print four copies
in each of two colors to have eight parts total.
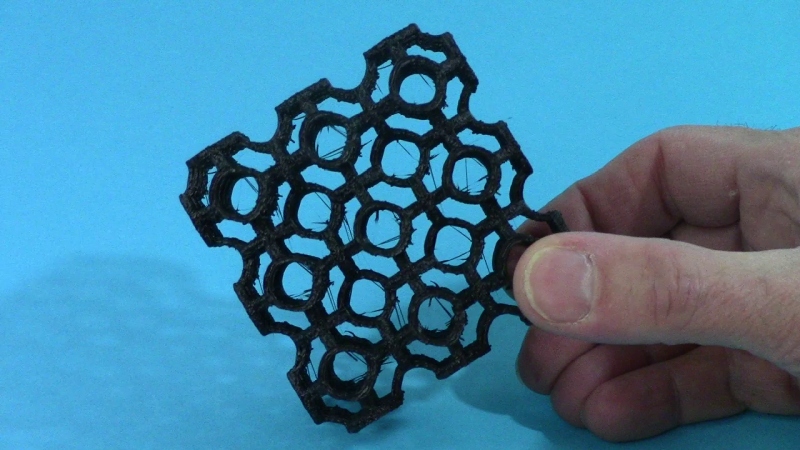
Here's a very cool structure made of circles, related
to the Schwarz minimal P-surface, as explained in
this
video.
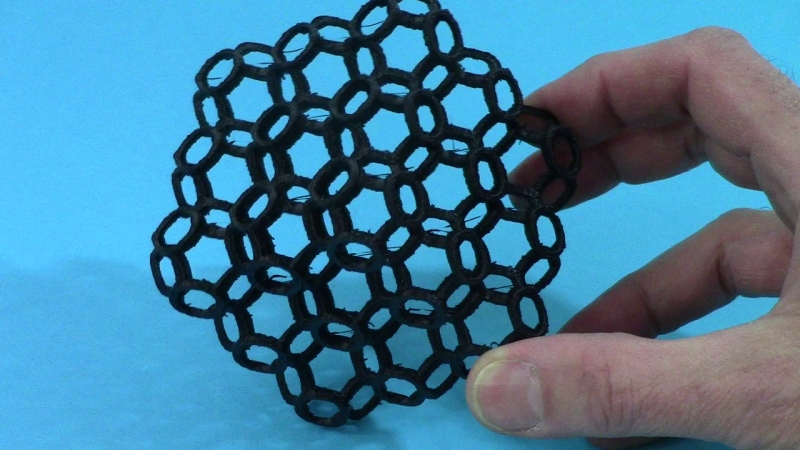
The same object looks very different when viewed from
other directions. The (10MB) stl file is
here.
(I have more to add here when I get time...)